Thursday, March 23, 2017

Filled Bread - Two Ways

I've been watching a lot of The Great British Bake Off and got inspired after watching the bread episode in Season 3.  They were stuffing their breads with so many things! So I started looking around for a filled bread recipe.  I also had a ton of garlic scape pesto to use up from the freezer.  The recipe I used is from King Arthur's Flour, and it can be found here.  It is a gorgeous bread that tastes really good, especially with a fried egg on top.  I ended up making two different flavors since the bread dough came together so easily.


Bread Dough Ingredients (makes 1 loaf):
3 cups bread flour - 12.75 oz
2 tsp instant yeast
1 1/4 tsp salt
1 large egg
1/2 whole milk at 100F*
1/3 water at 100F*
3 Tbsp olive oil

Tuscan Bread Filling Ingredients:
3/4 cup garlic scape pesto (you can use any type of pesto)
1/3 cup basil, chopped
1/2 cup oil packed sun-dried tomatoes*

French Bread Filling Ingredients:
1 onion, sliced in half rings*
1 cup marbled blue cheese, shredded*

Directions:
1. Place milk and water into a 1 cup liquid measuring cup and heat in the microwave for 10-15 seconds.  The target temperature of the mixture is around 100F.  Add the yeast to this mixture.  The extra heat helps the yeast get going.  Let soak for around 5 minutes.
2. Combine the flour, salt, egg, olive oil and yeast mixture in a bowl and mix until just incorporated.  Turn out onto a lightly floured surface and knead by hand until the dough is smooth and uniform.  The dough should be very soft.
3. Place the dough in a lightly greased bowl, cover, and let it rise for 45 to 60 minutes, or until it's doubled in size.  Repeat steps 1 through 3 if you want to make both flavors.
4. Meanwhile, prep the filling ingredients.  Chop the onions and sauté them in a little bit of olive oil on low heat until caramelized (this will take 30 minutes to 1 hour).  Drain the tomatoes, and pat dry and chop.
5. Gently deflate the dough. Flatten and pat it into a 22" x 8 1/2" rectangle. Spread with the filling ingredients.
6. Starting with one long edge, roll the dough into a log the long way. Pinch the edges to seal. Place the log seam-side down on a lightly greased or parchment-lined baking sheet.
7. Using kitchen shears or a razor blade, start 1/2" from one end and cut the log lengthwise down the center about 1" deep, to within 1/2" of the other end.
8. Keeping the cut side up, form an "S" shape. Tuck both ends under the center of the "S" to form a "figure 8;" pinch the ends together to seal.
9. Cover and let rise in a warm place until double, 45 to 60 minutes.*
10. While the loaf is rising, preheat the oven to 350°F.  I like to bake my bread on a pizza stone in the oven.  If using a stone, make sure to preheat for at least 30 minutes. 
11. Uncover the bread, and bake it for 35 to 40 minutes, tenting it with foil after 20 to 25 minutes to prevent over-browning.*
12. Remove the bread from the oven, and transfer it to a rack to cool. Enjoy warm or at room temperature. Store, well-wrapped, at room temperature for a couple of days; freeze for longer storage.

Recommended Alterations:
*I plan to use 1 cup oil packed sun-dried tomatoes next time.
*I plan to use 2 onions instead of 1 to get more flavor next time.
*The marbled blue cheese I had to use up is unique to Wisconsin, I have never seen it before.  Next time I would use normal blue cheese crumbles and start with 1/2 cup crumbles, since it can have a very strong flavor.
*Since I made two doughs back to back, the first bread had to wait a lot longer on its second rise before it was baked.  This resulted in the asymmetrical bake.  If you want to bake two loaves, I would delay making the second dough by 45 minutes.
*I didn't need to tent the bread since I like a really deep golden brown on my breads.  Although I'm wondering if I baked it for too long and that is why it was a little dry.  Next time I plan on baking to an internal temperature of 190F.  My loaves were around 205F when I took them out of the oven.

Wednesday, July 29, 2015

Roasted Carrot and Fennel Soup with Fennel Seed Oil

This is our second year doing a CSA (community supported agriculture) from Sleepy Root Farm.  They deliver right to Jason's work, so it is really convenient.  One of the greatest things about a CSA is that it gets you to try different types of produce than you normally would and it forces you to be creative in finding ways to use certain items.  For the last few weeks, I wasn't sure how to use my fennel bulbs.  I've never really cooked with fennel and the raw smell of it was a little off-putting.  It smelled super strongly of anise.  So yesterday I did some research online and found a semi-easy recipe for soup (from rouxbe.com).  I had most of the ingredients at home already so I only needed to buy some stock (I really need to start making my own).  This soup turned out wonderful and I plan to use my yearly fennel for it in the future.  I doubled the recipe below (because I had to use all my fennel!) and froze 3 quarts of soup and ate about 1 quart.  So a single recipe will probably make about 2 quarts of soup and serve 6 people.


iPhone Photo by Jason Hedlund

Ingredients:
2 medium fennel bulbs, sliced
1 lb carrots, diced
1 large onion, sliced
2 cloves garlic, crushed
3 Tbsp olive oil
1 Tbsp brown sugar
salt and pepper

2 Tbsp butter
5 cups chicken stock (I used broth from Target)
1 bay leaf
1 sprig of thyme (I used dried since I ran out of fresh)
salt and pepper

1 tsp fennel seeds
1 tsp olive oil

Directions:
1.  Preheat oven to 450F.
2.  In a sheet pan, add the vegetables and the rest of the ingredients and coat with oil.  Then put them in the oven for 25-30 minutes or until slightly caramelized.
3.  In a heavy pot, melt the butter, then add the roasted vegetables, chicken stock, bat leaf, thyme and bring to simmer.
4.  Let simmer for about 20 minutes then blend to smooth in a blender or using an emulsion blender in the pot.  Adjust seasoning of soup with salt and pepper to taste.
5.  Toast fennel seeds until they become fragrant, in a spice grinder or mortar and pestle grind the fennel seeds and add them to the oil.
6.  Drizzle oil over the soup and serve.  Enjoy!

Saturday, July 11, 2015

Poached Eggs with Tomato Fondue

The guest author today is the guy usually behind the camera, Beth's husband, Jason.  I recently found a series of cooking videos on YouTube by a French Chef, Raymond Blanc.  The series is called "Raymond Blanc: How to Cook Well".  Formerly a BBC series, each episode dives into a different technique (Slow Cooking, Poaching, Roasting, Baking, Frying, BBQ & Grill).  All of the recipes in the video look phenomenal, and Beth and I are inspired to cook our way through each episode.

Today we made our first recipe from the Poaching episode.  It is Saturday morning, and I've got time to make a delicious breakfast (and it sure was!).  Here it is:

Photo by: Jason Hedlund


I'm not going to write out the recipe, since it is available online.  Here are the links:

Raymond Blanc: How to Cook Well - Poached Eggs  (I highly recommend watching this first)

Poached Eggs with Tomato Fondue - PDF Recipe (This version doesn't include the bacon)


I hope you enjoy this breakfast as much as we did! It might just be the best breakfast I've ever had in my life.


Bon appétit,

Jason

Wednesday, May 20, 2015

Carrot Loaf Cake

I had some leftover carrots that were about to go bad.  I wanted to use them up, so I found this recipe in my May issue of Bon Appetit magazine.  It was super fast to make and really good.  I've copied the recipe below, but it can also be found here.  I had some last night and for breakfast this morning!

Photo By: Jason Hedlund


Ingredients:
1 cup vegetable oil
1¼ cups plus 1 tablespoon all-purpose flour
1½ teaspoons baking powder
1½ teaspoons ground cinnamon
½ teaspoon kosher salt
½ cup golden raisins (we used normal raisins, the golden ones are mainly for looks)
½ cup walnuts, coarsely chopped (we left these out)
3 large eggs
1 cup granulated sugar
2 teaspoons vanilla extract
8 ounces carrots, coarsely grated (about 2 cups)
2 teaspoons light brown sugar


Directions:
(1) Preheat oven to 350°. Lightly oil and flour a 9x5" loaf pan (important because this loaf tends to stick). Whisk baking powder, cinnamon, salt, and 1 ¼ cups flour in a small bowl. Toss raisins, walnuts, and remaining 1 Tbsp. flour in another bowl.
(2) Using an electric mixer on medium-high speed, beat eggs and granulated sugar in a medium bowl until light and fluffy, about 4 minutes. With mixer running, gradually drizzle in 1 cup oil, then add vanilla. Fold in dry ingredients, raisin mixture, and carrots; scrape batter into prepared pan. Sprinkle with brown sugar.
(3) Bake cake until a tester inserted into the center comes out clean, 65–75 minutes. Let cool slightly in pan, then turn out onto a wire rack to cool completely.  Enjoy!

Do Ahead: Bake up to 2 days ahead. Store wrapped at room temperature.

Monday, May 11, 2015

Roast Chicken with Rhubarb Butter and Asparagus

I recently started cooking with the entire chicken, instead of just breasts or thighs.  I really enjoy it!  There is value in knowing where our food comes from so we can appreciate our meals more.  Last year my husband and I ordered whole broiler birds from a farm near our CSA, we ended up grilling them for Thanksgiving.  This past weekend we roasted a whole chicken with a recipe from the May issue of Bon Appetit magazine.  A link to the recipe is here.  It was really easy and very tasty.

Photo by Jason Hedlund

Ingredients:
1 large rhubarb stalk, cut into ½-inch pieces
¼ cup fresh orange juice
2 tablespoons honey
1 tablespoon finely grated peeled ginger
½ cup (1 stick) unsalted butter, room temperature
Kosher salt and freshly ground black pepper
1 3½–4-pound chicken, backbone removed, chicken patted dry
2 tablespoons olive oil, divided
1 tablespoon fresh thyme leaves
1 bunch asparagus, trimmed
2 lemons, halved

Directions:
(1) Bring rhubarb, orange juice, honey, and ginger to a simmer in a small saucepan over medium-low heat. Cook, stirring occasionally, until rhubarb is soft but not falling apart, about 5 minutes. Drain over a small bowl. Reserve cooking liquid and rhubarb separately; let cool.
(2) Mix rhubarb and butter in a small bowl until smooth; season with salt and pepper. Set aside 1 Tbsp. rhubarb butter for vegetables.
(3) Preheat oven to 400°. Place chicken, skin side up, on a rimmed baking sheet. Gently slide your fingers underneath skin to loosen and rub flesh all over with remaining rhubarb butter (try not to tear skin). Drizzle chicken with 1 Tbsp. oil and some of the reserved rhubarb cooking liquid, scatter thyme over, and season with salt and pepper.
(4) Roast chicken until skin is browned and crisp and meat is cooked through (juices will run clear and an instant-read thermometer inserted into the thickest part of a thigh should register 165°), 40−50 minutes. Let rest 10 minutes.
(5) Meanwhile, prepare grill for medium-high heat (or heat a grill pan over medium-high). Toss asparagus in a large bowl with remaining 1 Tbsp. oil; season with salt and pepper. Grill asparagus and lemons (cut side down), turning asparagus often, until stalks are just tender, 2−3 minutes. Let lemon halves cool.
(6) Toss asparagus with reserved rhubarb butter. Serve chicken and asparagus with any pan juices drizzled with grilled lemons for squeezing over.  Enjoy!

Saturday, May 9, 2015

Strawberry Semifreddo

I found this recipe in the May issue of Bon Appetit magazine.  I was planning a Mother's Day dinner and thought this would be perfect for a warm day.  It was pretty easy to make, you just have to make it 4 hours ahead of time to give it time to freeze.  This recipe makes 8 servings and is excellent!

Photo by: Jason Hedlund

Ingredients:
1 lb strawberries, hulled, quartered
1/3 cup sugar
1 Tbsp white wine vinegar
3 Tbsp black sesame seeds (we used chopped dark chocolate)
2 cups heavy cream
pinch of salt
2/3 cup sweetened condensed milk
1/2 cup plain whole-milk Greek yogurt

Directions:
(1) Cook strawberries and sugar in a medium pot over medium heat, stirring occasionally, until strawberries have broken down into a thick, chunky jam (they should not be syrupy), 10-15 minutes.  Stir in vinegar, let cool.
(2) Meanwhile, toast black sesame seeds in a dry skillet over medium heat until fragrant, about 2 minutes.  Let cool.
(3) Whip cream and salt until cream holds a medium-stiff peak. Gently whisk in sweetened condensed milk and yogurt until completely blended.  Gently fold in half of strawberry jam, just enough to create streaks, then gently fold in remaining jam (mixture should look marbled with pockets of jam).
(4) Transfer to medium bowl or loaf pan and freeze until firm, at least 4 hours and up to 3 days.  Serve semifreddo topped with toasted sesame seeds (or chocolate).  Enjoy!

Deli-Style Rye Bread

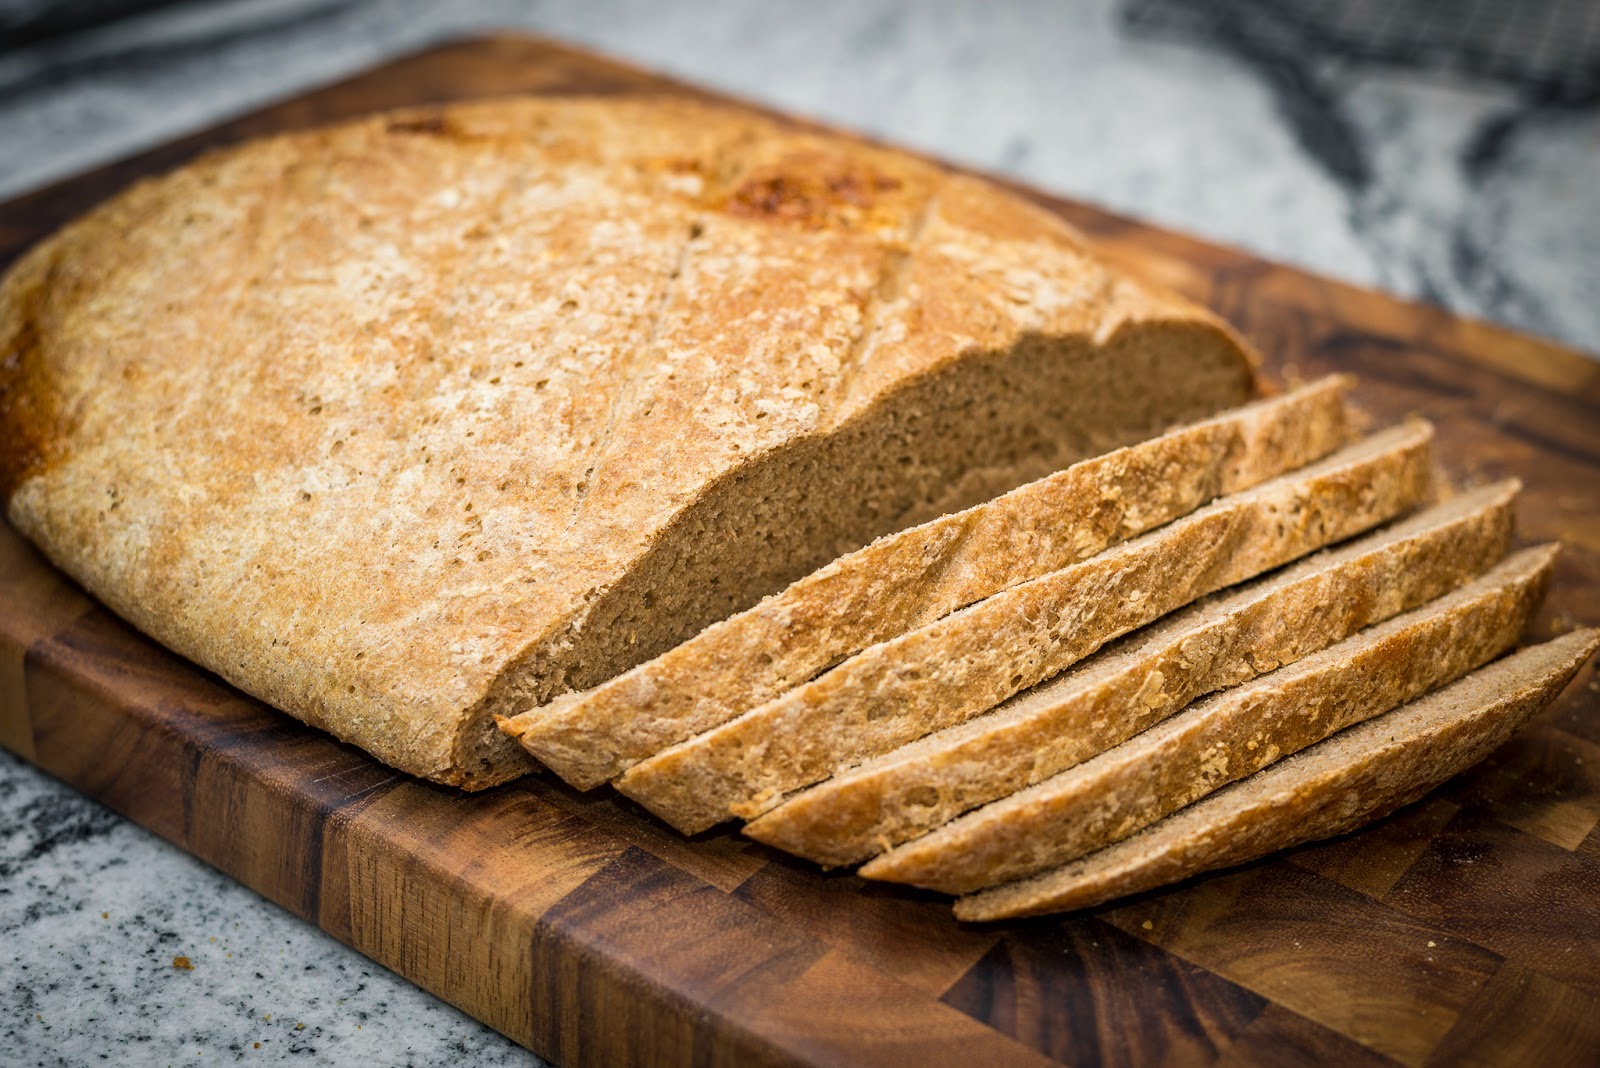
I've been wanting to make rye bread since I started baking my own bread.  I found this recipe in my favorite cookbook.  It makes ones giant loaf (half can be frozen) and tastes super tangy and yummy.  It takes about 5-6 hours to make so it is perfect for a Saturday or Sunday.

Photo by: Jason Hedlund


Ingredients:
Sponge:
2/3 cup rye flakes (optional)
2 3/4 cups water, at room temperature
1 1/2 tsp instant yeast
2 Tbsp honey
3 cups unbleached all-purpose flour

Dough:
1 1/2 cups unbleached all-purpose flour, plus more for dusting work surface
3 1/2 cups medium or light rye flour (I used dark rye flour since that is what we had)
2 Tbsp caraway seeds (we omitted this because we didn't have any and the book said it was ok)
2 Tbsp vegetable oil
1 Tbsp salt
cornmeal for sprinkling the baking sheet

Glaze:
1 egg white
1 Tbsp milk

Directions:
(1) For the sponge: Heat the oven to 350F; toast the rye flakes, if using, on a small baking sheet until fragrant and golden brown, 10-12 minutes.  Cool to room temperature.  Mix the water, yeast, honey, rye flakes, and flour in mixing bowl of a standing mixer to form a thick batter.  Cover with plastic wrap and let sit until bubbles form over the entire surface, at least 2 1/2 hours.  (The sponge can stand at cool room temperature overnight).
(2) For the dough: Stir the all-purpose flour, 3 1/4 cups of the rye flour, the caraway seeds, oil, and salt into the sponge.  Attach the dough hook and knead the dough at low speed, adding the remaining 1/4 cup rye flour once the dough becomes cohesive; knead until smooth yet sticky, about 5 minutes.  With moistened hands, transfer the dough to a well floured work surface, knead it into a smooth ball, then place it in a very lightly oiled large bowl or straight-sided container.  Cover with plastic wrap and let rise at warm room temperature until doubled in size, 1 1/4 to 2 hours.
(3) Generously sprinkle the cornmeal on a large baking sheet.  Turn the dough onto a lightly floured work surface and press it into a 12 x 9-inch rectangle.  (For 2 smaller loaves, half the dough, pressing each portion into a 9 x 6 1/2-inch rectangle.)  With one of the long sides facing you, roll the dough into a 12-inch log (or two 9-inch logs), seam-side up.  Pinch the seam with your finger tips to seal.  Turn the dough seam-side down and, with your finger tips, seal the ends by tucking them into the loaf.  Carefully transfer the shaped loaf to the prepared baking sheet, cover loosely with oiled plastic wrap, and let rise until the dough looks bloated and dimply and starts to spread out, 60 - 75 minutes.  Adjust an oven rack to the lower-middle to position and heat oven to 425F.
(4) For the glaze: Whisk the egg white and milk together and brush over sides and top of loaf.  Right before baking, make 6-7 slashes, 1/2-inch deep, in the top of the dough with a single-edge razor blade or very sharp knife.  Bake for 15 minutes then lower oven temperature to 400F and bake until golden brown and instant-read thermometer inserted into center of loaf reads 200F, 25-30 minutes (or 15-20 minutes for smaller loaves).  Transfer to a wire rack and cool to room temperatures.  Enjoy!

Sunday, May 3, 2015

Chicken and Chorizo Paella

We've been wanting to make paella for a long time.  Last night we finally made it!  We got this recipe from our favorite kitchen store: Kitchen Window in Minneapolis, MN.  This is where we bought our 14" paella pan.  The recipe below takes about 1.5 to 2 hours to prep and cook and makes about 8 servings.

Photo by Jason Hedlund


Photo by Jason Hedlund

Ingredients:
1/2 cup reserved olive oil from grilled artichokes
1/2 cup olive oil
2 cups onion, medium diced
5 cloves garlic, minced
4 oz Chorizo sausage, thinly sliced
1 (28oz) can of whole pomodoro tomoatoes (Italian plum), lightly crushed
2 1/2 cups Matiz-Bomba rice (we used Arborio which worked great!)
5 cups chicken stock (plus 2 cups on reserve)
1 tsp pimenton (paprika)
1 tsp turmeric
1/4 tsp saffron
1/4 tsp oregano, dried
salt and pepper to taste
1 lb lightly grilled chicken thighs, sliced or chopped
1 red bell pepper, julienned
1 cup leeks; cross cut into 1/4-inch coins (about 1 medium leek)
1 cup sugar snap peas
1 small/medium jar of grilled artichokes in oil, drained and quartered
1/2 cup Marcona Almonds (fried and salted), halved (we left these out)

Directions:
1. This recipe can be prepared in your paella pan, on your cooktop or grill. 
2. Add turmeric, saffron, pimenton, oregano, salt and pepper to your stock and set aside.
3. Heat the oil in a seasoned, 8 person paella pan over medium heat. 
4. Add the onion and sauté until transparent but not brown. 
5. Add the garlic and cook until softened but not brown. 
6. Add the chorizo and cook for about 5 minutes. 
7. Add the rice and sauté for 5 minutes. 
8. Add the tomatoes. 
9. Pour in the stock that has been combined with your dry seasonings. Turn heat to high. 
10. Stir once, but DO NOT STIR any more. This is critical to build up the signature crust. If grilling, close the lid to your grill. As soon as the crust starts to form, reduce the heat to medium.  The best way to know when the crust is forming is by the smell of carmelization/burning as soon as it starts.  Scrape and turn over your paella. Crust your paella 1-7 times. 
11. Add the remaining ingredients. Stir lightly into the surface. Avoid scraping the bottom of the pan and 
disturbing the crust. 
12. Cook for 5 minutes or until the liquid has been absorbed, the chicken is cooked through and the rice is tender.  Add additional stock if necessary.  Enjoy!

Sunday, April 26, 2015

Rustic Italian Bread

This is my husband's favorite bread recipe that I make.  It needs to be started the day before you want to finish it.  The day you want to eat the bread you must start the bread 8 hours before.   It is quite the time commitment, but really is just a bunch of waiting for the dough to rise.  It is perfect to make on a Saturday or Sunday when you plan to be home all day anyway.  It makes a huge loaf and requires a few special kitchen tools, but is worth the time and wait.  If spending all day making bread seems ridiculous to you, just stick with the sandwich bread recipe. :)  Sometimes we eat the whole loaf in a few days and other times we freeze half the loaf and eat the one half.  This recipe is from my favorite cookbook: The New Best Recipe by Cook's Illustrated.


Ingredients:

For the Sponge:
2 cups bread flour
1/4 tsp instant yeast
1 cup water, at room temperature

For the Dough:
3 cups bread flour, plus more for dusting work surface and hands
1 tsp instant yeast
1 1/3 cup water, at room temperature
2 tsp salt

Directions:
(1) For the sponge: Combine flour, yeast, and water in the bowl of a standing mixer fitted with the dough hook.  Knead at the lowest speed until the ingredients form a shaggy dough, 2 to 3 minutes.  Transfer the sponge to a medium bowl, cover tightly with plastic wrap, and let stand at room temperature until it begins to bubble and rise, about 3 hours.  Refrigerate the sponge at least 8 hours or up to 24 hours.
(2) For the dough: Remove the sponge from the refrigerator and let stand at room temperature while making the dough.  Combine the flour, yeast, and water in the bowl of a standing mixer fitted with the dough hook; knead at the lowest speed until a rough dough is formed, about 3 minutes.  Turn the mixer off and, without removing the dough hook or bowl from the mixer, cover the bowl loosely with plastic wrap; let the dough rest 20 minutes.
(3) Remove the plastic wrap, add the sponge and salt to the bowl, and continue to knead at the lowest speed until the ingredients are incorporated and the dough is formed (the dough should clear the sides of the bowl but stick to the bottom), about 4 minutes.  Increase the mixer speed to medium-low and continue to knead until the dough forms a more cohesive ball, about 1 minute.  Transfer the dough to a large lightly oiled bowl (at least 3 times the dough's size) and cover tightly with plastic wrap.  Let the dough rise in a cool, draft-free spot until slightly risen and puffy, about 1 hour.
(4) Remove the plastic wrap and turn the dough.  Use the image below as a guide.  Replace the plastic wrap; let the dough rise 1 hour.  Turn the dough again, replace the plastic wrap, and let the dough rise 1 hour longer.


(5) To shape the dough: Dust a work surface liberally with flour.  Gently scrape the dough from the bowl and invert onto the work surface (the side of the dough that was against the bowl should now be facing up).  Dust the dough and yours hands liberally with flour and, using minimual pressure, push the dough into a rough 8x10 inch rectangle.  Following the illustrations below, shape the dough and transfer to a large sheet of parchment paper.  Dust the load liberally with flour and cover loosely with plastic wrap; let the loaf rise until doubled in size, about 1 hour.  Meanwhile, adjust an over rack to the lower-middle position, place a baking stone on the rack, and heat the oven to 500F.


(6) To bake: Using a single-edge razor blade or sharp chef's knife, cut a slit, 1/2 inch deep lengthwise along the top of the loaf, starting and stopping 1 1/2 inches from the ends (or slit another design if desired); spray the loaf lightly with water.   Slid the parchment sheet with the loaf onto a peel or inverted rimmed baking sheet, then slid the parchment with the loaf onto the hot baking stone in the oven.  Bake 10 minutes, then reduce the oven temperature to 400F and quickly rotate the loaf from front to back using the edges of the parchment; continue to bake until deep golden brown and an instant read thermometer, inserted into the center of the loaf reads 210F, about 35 minutes longer.  Transfer to a wire rack, discard the parchment, and cool the loaf to room temperature, about 2 hours.  Enjoy!


Friday, April 24, 2015

Easy Stir Fry!

I was on my way home from work and stopped at the grocery store.  I just bought a bunch of yummy vegetables and went home.  When I got home I realized I bought a bunch of things that would go perfect in a stir fry.  This recipe makes 8 servings, we wanted leftovers.


Ingredients:
20 oz chicken, cut into small bites
4 cups cooked Basmati rice
1 bag frozen broccoli
1 bag frech sugar snap peas
3 large carrots, cut into slivers
4 Tbsp soy sauce
1 tsp toasted seasame seed oil
1/4 cup peanuts
6 Tbsp peanut oil

Directions:
(1) Cook rice according to package.
(2) Add peanut oil to wok over high heat.  Cook chicken over high temperature until browned but not cooked through, about 2-4 minutes.  Remove from heat and set aside.
(3) Lightly beat eggs in bowl.  Add to hot wok and heat until cooked through.  Add cooked rice to eggs and mix.  Set aside.
(3) Add more oil to wok and cook vegetables until crisp tender.  Add the chicken and rice/egg mixture at the end and mix.  Add soy sauce and stir until hot.  Enjoy!

Monday, April 20, 2015

Sandwich Bread

Before the remodel, I had been baking bread for about 2 months.  This white sandwich bread recipe is our favorite and quite easy to make.  After it is cooled, it is excellent with butter and honey or made into a sandwich.  This recipe makes one loaf and is from my book "The New Best Recipe" by Cooks Illustrated (the recipe book I use the most!).

Photo By: Jason Hedlund

Ingredients:
3 3/4 cups unbleached all-purpose flour, plus more for dusting the work surface
2 tsp salt
1 cup warm whole milk (about 110F)
1/3 cup warm water (about 110F)
2 Tbsp unsalted butter, melted
3 Tbsp honey
1 envelope (about 2 1/4 tsp) instant yeast

Directions:
(1) Adjust oven rack to the lowest position and heat the oven to 200F.  Once the oven temperature reaches 200F, maintain the heat for 10 minutes, then turn off the oven.
(2) Mix 3 1/2 cups of flour and salt in bowl of standing mixer fitted with the dough hook.  Mix the milk, water, butter, honey, and yeast in 4-cup liquid measuring cup.  Turn the machine to low and slowly add the liquid.  When the dough comes together, increase the speed to medium and mix until the dough is smooth and satiny, stopped the machine 2 or 3 times to scrape the dough from the hook, if necessary, about 10 minutes. (After 5 minutes of kneading, if the dough is still sticking to the sides of the bowl, add the remaining flour, 1 Tbsp at a time and up to 1/4 cup total, until the dough is no longer sticky.) Turn the dough onto a lightly floured work surface; knead to form a smooth, round ball, and 15 seconds.
(3) Place the dough in a lightly oiled bowl, rubbing the dough around the bowl to coat lightly.  Cover the bowl with plastic wrap and place in warmed oven until the dough doubles in size, 40 to 50 minutes.
(4) Gently press the dough into an 8-inch square that measures 1 inch thick.  Starting with the side farthest away from you, roll the dough firmly into a cylinder, pressing with your fingers to make sure the dough sticks to itself.  Turn the dough seam-side up and pinch it closed.  Place the dough seam-side down in a greased 9x5 inch loaf pan and press it gently so it touches all four sides of the pan.  Cover with plastic wrap; set aside in a warm spot until the dough almost doubles in size, 20 to 30 minutes.
(5) Keep one oven rack at the lowest position and place the other at the middle position, then heat the oven to 350F.  Place an empty baking pan on the bottom rack.  Bring 2 cups of water to a boil in a small saucepan.  Pour the boiling water into the empty pan on the bottom rack and set the loaf on the middle rack.  Bake until an instant-read thermometer inserted at an angle from the short end just above the pan rim into the center of the loaf reads 195F, 40 to 50 minutes.  Remove the bread from the pan, transfer to a wire rack, and cool to room temperature.  Slice and serve!

Sunday, April 19, 2015

Egg Soufflé!

We're almost moved into our new kitchen and I'm so excited to start using it again.  Per a request from a friend, I'm going to try and start blogging my recipes again.  This morning we wanted to make something fancier than scrambled eggs, so we made a classic egg soufflé!  We got the recipe from Kitchen Window (Minneapolis kitchen store).  The recipe made 4 servings so we halved it and replaced the Gruyere with Gouda since we didn't have any Gruyère.  If you need more detailed instructions than what I have below, here is the kitchen window recipe with more pictures.

Photo By: Jason Hedlund


Ingredients:
2 tablespoons Parmigiano-Reggiano cheese, finely grated
Butter for dish preparation
3 tablespoons unsalted butter
3 tablespoons unbleached all purpose flour
1 cup whole milk
1/2 teaspoon Kosher salt
Pinch of cayenne
5 large eggs, separated
4 ounces Gruyère cheese, coarsely grated  (we used Gouda)
    (about 1 cup), plus extra for topping


Directions:
(1) Preheat the oven to 400°F. Prepare a 1.5 quart soufflé dish (or 4 individual 8 ounce ramekins) by greasing the inside of the dish with a bit of butter. Add the finely grated Parmesan cheese to the dish, and shake to evenly distribute the cheese along the bottom and sides of the dish. Tap out any excess cheese. Add a collar of parchment paper and tie with a length of kitchen string.
(2) Begin the base with a roux. In a medium saucepan, melt 3 tablespoons of butter, add 3 tablespoons of flour. Cook for 2-3 minutes while continuously stirring. The roux will form with the appearance of a thick paste, and any raw flour taste will dissipate. Add the milk gradually while continuing to whisk. Add the salt and cayenne, and continue stirring until the mixture becomes thickened. Remove from heat.
(3) Separate the eggs; place the egg whites in a large, clean, grease-free mixing bowl. Add the egg yolks to the thickened roux one at a time, whisking well after each addition.
(4) Add the grated Gruyère cheese (reserving a few shreds for topping) to the base mixture and stir until melted. Allow to cool slightly from a hot to a warm temperature. Transfer the mix to a large mixing bowl.
(5) Beat the egg whites with a hand mixer, or with the whisk attachment of a stand mixer until stiff peaks form.
(6) Lighten the egg yolk base by transferring about a quarter of the egg whites to the base mixture, and gently folding them in until evenly distributed. Add half of the remaining egg whites with a gentle folding motion, and repeat with the remaining half. Take care to maintain the airy nature while folding and mixing.
(7) Transfer the mixture to the prepared soufflé dish (or the individual ramekins) and carefully place in the oven. Reduce the heat to 375°F. Bake for 25-30 minutes (20-25 minutes for individual dishes) or until set and edges browned. The center should be cooked but may remain a bit wiggly. DO NOT OPEN the oven door for the first 20 minutes! The change in temperature may cause the soufflé to deflate prematurely.
(8) When the baking is nearly complete, sprinkle the remaining shreds of Gruyère cheese on top and return to the oven for an additional 2-3 minutes or until the cheese is nicely melted. Serve promptly.

Thursday, March 28, 2013

Greek Potatoes with Lemon Vinaigrette

This recipe came from my newest issue of Food Network magazine.  They were super easy to make, they just took a little while to bake in the oven.  The recipe below makes 6 servings.

* Image by Jason Hedlund

Ingredients:
1 cup olive oil
6 Tbsp fresh lemon juice 
1 large shallot, quartered
2 cloves garlic, chopped
4 sprigs oregano, leaves only (or 1 Tbsp dried)
1/4 cup fresh parsley leaves, plus 1 Tbsp chopped, for servings (we used dried)
salt and pepper
3 lbs russet potatoes, cut lengthwise into wedges (we used red potatoes because that's what we had)

Directions:
1.  Preheat oven to 425F.  Put the olive oil, lemon juice, shallot, garlic, oregano, and parsley in food processor; add 1 tsp salt, and pepper to taste.  Puree until mostly smooth.
2.  Toss the potatoes with 1/2 cup of the prepared vinaigrette in a large bowl and spread in a single layer on a rimmed baking sheet. (Reserve remaining vinaigrette for dipping).  Roast potatoes for 45 minute to 1 hour, turning occasionally, under tender and golden.
3.  Transfer the potatoes to a platter and drizzle with some of the remaining vinaigrette.  Season with salt and garnish with chopped parsley.  Serve with the remaining vinaigrette on the side.  Enjoy!

Beth and Jason's Rating: Yummy and easy!

Original Recipe from:

Poached Pears in Red Wine

We were assigned the dessert for a dinner party and decided to make poached pears!  The recipe is from my "Holiday Entertaining" book.  The pears take awhile to cook, but they are really good.  The recipe below makes 4 servings.

*image from "Holiday Entertaining"

Ingredients:
4 firm but ripe Seckel pears, peeled with stems intact
2 1/2 cups Pinot Noir or other light, fruity red wine
1/2 cup sugar
1 lemon zest strip, 2 inches long by 3/4 inch wide
1-inch piece vanilla bean
1 1/2 cups water
1 cup fresh or thawed frozen unsweetened raspberries
1/2 cup fresh raspberries

Directions:
1.  Place pears in a non-aluminum saucepan large enough to hold them lying down.  Add the wine, sugar, lemon zest, vanilla bean, and the water.
2.  Place the pan over medium-high heat and bring to boil.  Reduce the head to medium-low, set a heatproof plate on top of the pears to keep them submerged in the liquid, and simmer gently until a thin knife inserted into the widest part of the pear pierces easily to the center, 35-40 minutes.  Remove the plate covering the pears.  Let the pears cool to room temperature in the liquid.
3.  Meanwhile, make a raspberry puree.  In a food processor or blender, puree the 1 cup fresh or frozen berries until smooth.  Pass the puree through a fine-mesh sieve held over a bowl, pressing with the back of a wooden spoon to push as much of the puree through the sieve as possible.  Discard the contents of the sieve.  Set the puree aside.
4.  Using a slotted spoon, lift the pears from the liquid.  Set each pear in a shallow individual bowl, or place all 4 pears on a deep platter.  Remove zest and vanilla bean and discard or save the vanilla bean to garnish, if you like.  Drizzle the raspberry puree onto the plate and garnish with a few fresh raspberries.  Serve at room temperature.  

Jason's Rating: Good
Beth's Rating: Good

Thursday, March 14, 2013

Thick and Chewy Chocolate Chip Cookies

This was one of the first recipes I tried in "The New Best Recipe" book.  I've made them again since.  They were so yummy and looked like they came right from a bakery.  The recipe makes 18 large cookies.


Ingredients:
2 cups plus 2 Tbsp unbleached all-purpose flour
1/2 tsp baking soda
1/2 tsp salt
12 Tbsp unsalted butter, melted and cooled until just warm
1 cup packed light or dark brown sugar
1/2 cup granulated sugar
1 large eggs, plus 1 large egg yolk
2 tsp vanilla extract
1 to 1 1/2 cups semisweet chocolate chips

Directions:
1.  Adjust the oven racks to the upper and lower-middle positions and heat the oven to 325F.  Line 2 baking sheets with parchment paper or spray them with nonstick cooking spray.
2.  Whisk the flour, baking soda, and salt together in a medium bowl; set aside.
3.  Either by hand or with an electric mixer, mix the butter and sugars until thoroughly blended.  Beat in the egg, yolk, and vanilla until combined.  Add the dry ingredients and beat at low speed just until combined.  Stir in the chips to taste.
4.  Rolls a scant 1/4 cup of the dough into a ball.  Hold the dough ball with the fingertips of both hands and pull into 2 equal halves.  Rotate the halves 90 degrees and, with jagged surfaces facing up, join the halves together at the base, again forming a single ball, being careful not to smooth the dough's uneven surface.  Place the formed dough balls on the prepared baking sheets, jagged surface up, spacing them 2 1/2 inches apart.  Follow the diagram below.
5.  Bake until the cookies are light golden brown, the outer edges start to harden, and the centers are still soft and puffy, 15 to 18 minutes, rotating the baking sheets front to back and top to bottom halfway through the baking time.  Cool the cookies on the sheets.  Remove the cooled cookies from the baking sheets with a wide metal spatula.  Enjoy!

Beth's Rating: 9/10! Better than Tollhouse cookies!

Original recipe from this book:
The New Best Recipe

Wednesday, March 13, 2013

Ultimate Hummus

For Valentine's Day I received a cookbook called "The Science of Good Cooking".  This book is amazing!  It describes all the science behind the cooking and baking techniques.  For a party, Jason and I made the recipe called "Ultimate Hummus" from this book.  It was super yummy!  We've made hummus once before from a different book, but it didn't turn out because we tried to "fast soak".  Chickpeas must be soaked overnight to get the proper texture.  The recipe below makes about 2 cups of hummus.

Image by Jason Hedlund

Ingredients:
1/2 cup dried chickpeas, picked over and rinsed
1/8 tsp baking soda
3 Tbsp lemon juice
6 Tbsp tahini
2 Tbsp olive oil
1 small garlic clove, minced
1/2 tsp salt
1/4 tsp ground cumin
pinch cayenne pepper
1 Tbsp minced fresh cilantro or parsley

Directions:
1.  Place the beans in a large bowl, cover with 1 quart water, and soak overnight.  Drain.  Bring 1 quart water, beans, and baking soda to boil in large saucepan over high heat.  Reduce heat to low and simmer gently, stirring occasionally, until beans are tender, about 1 hour.  Drain, reserving 1/4 cup bean cooking water, and cool.
2.  Combine cooking water and lemon juice in small bowl or measuring cup.  Whisk together tahini and 2 tablespoons olive oil in a second bowl.  Set aside 2 tablespoons chickpeas for garnish.
3.  Process remaining chickpeas, garlic, salt, cumin, and cayenne in food processor until almost fully ground, about 15 seconds.  Scrape down bowl with rubber spatula.  With processor running, add lemon juice mixture in steady stream.  Scrap down bowl and continue to process for 1 minute.  With processor running, add tahini mixture in steady stream; continue to process until hummus is smooth and creamy, about 15 seconds, scraping down bowl as needed.
4.  Transfer hummus to serving bowl, sprinkle reserved chickpeas and cilantro over surface, cover with plastic wrap, and let stand until flavors meld, at least 30 minutes.  Drizzle with olive oil and serve. (Hummus can be refrigerated for up to 5 days; refrigerate garnishes separately.  When ready to serve, stir in approximately 1 tablespoon water if texture is too thick).

Jason's Rating: Great!
Beth's Rating: Great!

Original Recipe from this book:
The Science of Good Cooking

Tuesday, March 12, 2013

Cheese Straws with Sesame Seeds

I recieved a book from a friend for Christmas that is called "Holiday Entertaining".  It has tons of recipes for holiday parties.  I made these for when I had my family over in February.  They were really easy to make and pretty tasty. The recipe makes 8-10 servings.

Image from "Holiday Entertaining"

Ingredients:
1/2 lb sharp cheddar cheese, shredded
2 oz Parmesan cheese, grated
1/2 cup unsalted butter, at room temperature
1/2 tsp freshly ground white pepper (we used black)
1/2 tsp cayenne pepper
1 cup all-purpose flour
1/2 cup black or white sesame seeds

Directions:
1.  In a food processor, combine the cheese, butter, white pepper, and cayenne pepper and process to a smooth paste.  Slowly add the flour, pulsing to blend.  When all of the flour is incorporated, gather the dough into a ball.  Wrap in plastic wrap and refrigerate for at least 1 hour and up to 3 hours.
2.  Preheat oven to 350F.  Lightly grease a baking sheet with butter or line it with parchment paper.
3.  Remove the chilled dough from the refrigerator and cut it into 6 equal pieces.  On a lightly floured work surface, use your palm to roll each piece into a rope about the diameter of a drinking straw.  Cut each rope into 6-8 inch lengths, or shorter if you like.  Sprinkle the sesame seeds, coating lightly on all sides.  Place the straws about 1 inch apart on the prepared baking sheet.
4.  Bake until golden brown and lightly crisp, 15-20 minutes.  Transfer the baking sheet to a wire rack and let cool for 5-10 minutes.  (Or, let cool completely and store in an airtight container for up to 8 hours.)  Transfer the cheese straws to a platter and serve warm.  Enjoy!

Jason's Rating: Good
Beth's Rating: Good

Original recipe from this book:
Holiday Entertaining

Monday, March 11, 2013

Dinner for Two (Main, Sides, and Dessert)

In my food network magazine there is always a weekend dinner section.  The Jan/Feb issue for this year had  a "Dinner for Two" meal.  It was meant for a Valentine's Day dinner.  This meal looked so good and pretty simple to make.  The only difficult thing was coordinating all the dishes to be done at the same time (especially with only two burners!).  The dinner below makes 2 large servings.  It was fantastic!  We've made this twice already.

Image by Jason Hedlund

Picture of Raspberry-Chocolate Parfaits Recipe
Image from www.foodnetwork.com

Roast Chicken and Mushrooms with Red Wine Sauce
Ingredients:
2 skin-on, bone-in chicken breasts (12 to 14oz each), we used boneless, but the timing works better if you use bone-in
salt and pepper
1 Tbsp vegetable oil
1 lb oyster and/or maitake mushrooms, trimmed and torn into pieces, spend the money on these fresh mushrooms, they are amazing!
1 Tbsp unsalted butter
1 Tbsp all-purpose flour
1/2 cup low-sodium chicken broth
1 cup dry red wine
1/2 tsp sugar

Directions:
1.  Preheat oven to 375F.  Season chicken with 1/2 tsp salt and pepper to taste.  Heat a medium skillet over medium-high heat; add 1/2 Tbsp vegetable oil, then add the chicken, skin-side down, and cook until the skin is golden brown, about 6 minutes.  Transfer to rimmed baking skeet, skin-side up; reserve the skillet.
2.  Toss the mushrooms with the remaining 1/2 Tbsp vegetable oil and season with salt and pepper; scatter around the chicken on the baking sheet.  Bake until the mushrooms are tender and a thermometer inserted into the thickest part of the chicken registers 160F, about 25 minutes.
3.  Meanwhile, melt the butter in the reserved skillet over medium heat.  Add the flour and cook, stirring, 1 minute.  Add the chicken broth and bring to a simmer, whisking.  Add the wine, sugar and 1/4 tsp salt and simmer until the sauce is reduced by half, about 10 minutes.  Season with salt and pepper.
4.  Spoon some of the red wine sauce onto each plate; top with the chicken and mushrooms.  Enjoy!

Pappardella in Saffron Cream
Ingredients:
1 Tbsp unsalted butter
1/2 small shallot, minced
pinch of saffron threads
2/3 cup heavy cream
pepper
1/4 tsp lemon juice
1/4 tsp vanilla extract
4 ounces pappardelle pasta
2 Tbsp grated Parmesan cheese, plus more for topping
2 Tbsp roughly chopped fresh chives
1/2 tsp grated lemon zest

Directions:
1.  Bring a pot of salted water to a boil.  Meanwhile, melt the butter in a medium skillet over medium head.  Add the shallot and saffron and cook, stirring occasionally, until the shallot is softened, about 2 minutes.  Add the cream, 1/4 tsp salt, and pepper to taste; increase the heat to medium high and simmer until slightly thickened, about 2 minutes.  Stir in lemon juice and vanilla.
2.  Add the pasta to the boiling water and cook as label directs.  Remove 1/4 cup cooking water, then drain the pasta and transfer to the skillet with sauce.  Add the reserved cooking water, the parmesan and half of the chives and toss to coat.  Serve topped with the lemon zest, remaining chives and more cheese.  Enjoy!

Raspberry-Chocolate Parfaits
Ingredients:
1/2 cup raspberries
1 Tbsp chocolate liqueur
brownies
chocolate ice cream
whipped cream

Directions:
1.  Toss raspberries with chocolate liqueur.
2.  Layer with crumbled brownies and chocolate ice cream in 2 glasses.
3.  Top with whipped cream and more raspberries! YUM!

Jason's Rating: "closest thing to a 10 that I've had" - the dinner as a whole
Beth's Rating: 10/10! This dinner is paired perfectly

Links to original recipes:
Roasted Chicken and Mushrooms with Red Wine Sauce
Pappardelle with Saffron Cream
Raspberry Chocolate Parfaits

Wednesday, January 2, 2013

Popcorn from Scratch

I was watching a movie and had a hankering for some popcorn, but didn't have any microwave kind!  So I looked up this recipe and it worked perfectly!  This recipe makes 2 very large servings.  I found this recipe from www.simplyrecipes.com.


Ingredients:
3 Tbsp grape seed or canola oil
1/3 cup high quality popcorn
1 3-quart saucepan
2 Tbsp of butter (or more to taste)
salt to taste

Directions:
1.  Heat the oil on medium-high heat in saucepan.  Salt oil.
2.  Put 3-4 kernels in the pan with oil and cover.
3.  When kernels pop add the rest of the 1/3 cup of popcorn to the pan.  Cover and remove from heat and count to 30 seconds.
4.  Return the pan to heat.  The popcorn should start popping soon.  Once it is popping, gently shake the pan by moving it back and forth across the burner.  Try to keep the cover slightly ajar to let the steam out.  Once the popping has a few seconds between pops, remove the cover and dump all the popcorn in a deep bowl.
5.  Melt butter in the empty pan and mix in with popcorn.  Enjoy!

Beth's Rating: 7/10

Link to original recipe:
Popcorn from Scratch

Monday, December 31, 2012

Rocky Mountain Cupcakes

This was my last recipe of 2012!!!!  I started with cupcakes so I decided to end with one.  This recipe is from the book: "1001 Cupcakes, Cookies and other tempting treats".  The recipe below makes 10 cupcakes.

Image by Jason Hedlund

Ingredients:
Cupcakes:
3/4 cup butter, softened
3/4 cup superfine sugar
1 tsp vanilla extract
3 eggs, lightly beaten
heaping 1 cup self-rising flour
1/2 cup unsweetened cocoa

Topping:
1 cup butter, softened
1 Tbsp cream or milk
2 1/2 cups powdered sugar
1/2 cup unsweetened cocoa
3oz mini marshmallows
1/2 cup walnuts, coarsely chopped
2 oz milk chocolate, or semisweet chocolate, broken into pieces

Directions:
1.  Preheat oven to 350F.  Line a 12-hole muffin pan with 10 paper liners.
2.  Place the butter and sugar in a large bowl and beat together until light and fluffy, then beat in the vanilla extract.  Gradually beat in the eggs.  Sift the flour and the cocoa together and fold into the mixture.  Spoon the batter into the paper liners.
3.  Bake in the preheated oven for 20-25 minutes, or until golden and springy to touch.  Transfer to a wire rack to cool completely.
4.  To make the buttercream place the butter and cream in a bowl and beat together.  Gradually sift in the sugar and cocoa powder and beat until smooth.  To decorate, pipe the buttercream on top of each cake to form a peak in the center. Mix the marshmallows and walnuts together and divide among the cakes, then press down lightly.  Place the chocolate in a heatproof bowl, set the bowl over a pan of gently simmering water, and heat until melted.  Drizzle over the tops of the cakes and let set.

Terri's Rating: 7/10
Jason's Rating: 8/10
Beth's Rating: 7/10

Nutrition:
550 calories
34g fat (19g saturated)
140mg cholesterol
250mg sodium
58g carbohydrates
3g fiber
42g sugar
6g protein